Post function #
You can use the post function to perform additional actions after a transition is executed. You can the advantage of full Jira Cloud REST API: https://developer.atlassian.com/cloud/jira/platform/rest/v3/
Post functions are webassembly functions (WASM). You can write your own post function and deploy it to Extensions for Jira Workflow app. Extensions for Jira Workflow app will execute your post function when the issue transition is executed.
We have example code repo that you can use to get started:
Inside example project you can find
- AssemblyScript code that interact with Jira issue (fetch issue data, create comment)
- functions that perform arbitrary calculations and data manipulation
- Bitbucket pipeline example that builds and deploy your post function to the Extensions for Jira Workflow app.
Wiring up your post function to the Extensions for Jira Workflow app includes 3 steps.
- Create a new post function in the Extensions for Jira Workflow app
- Deploy your post function to the Extensions for Jira Workflow app
- Pick your post function in the Jira workflow transition
1. Create a new post function #
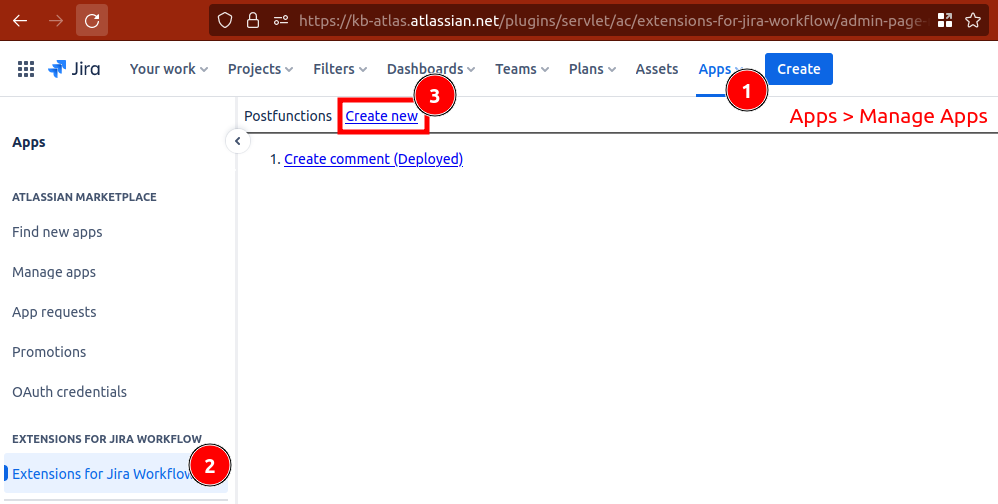 From top menu select “Apps” and click “Manage Apps” button.
From side menu select “Extensions for Jira Workflow” and click “create new” link.
From top menu select “Apps” and click “Manage Apps” button.
From side menu select “Extensions for Jira Workflow” and click “create new” link.
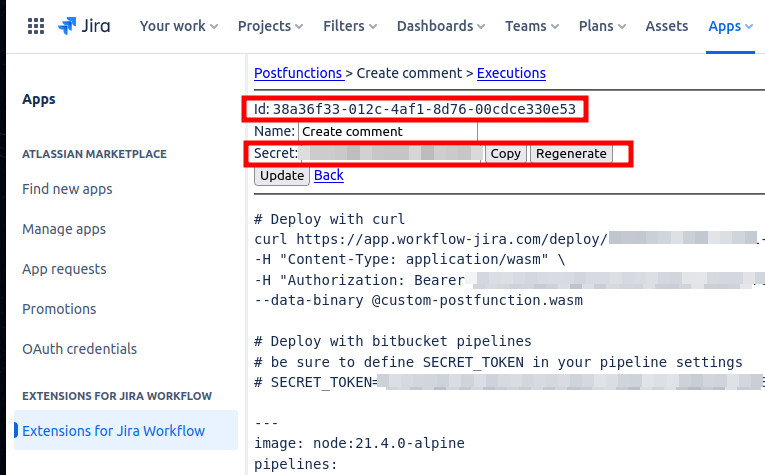 Save id and secret, you will need them to deploy your post function.
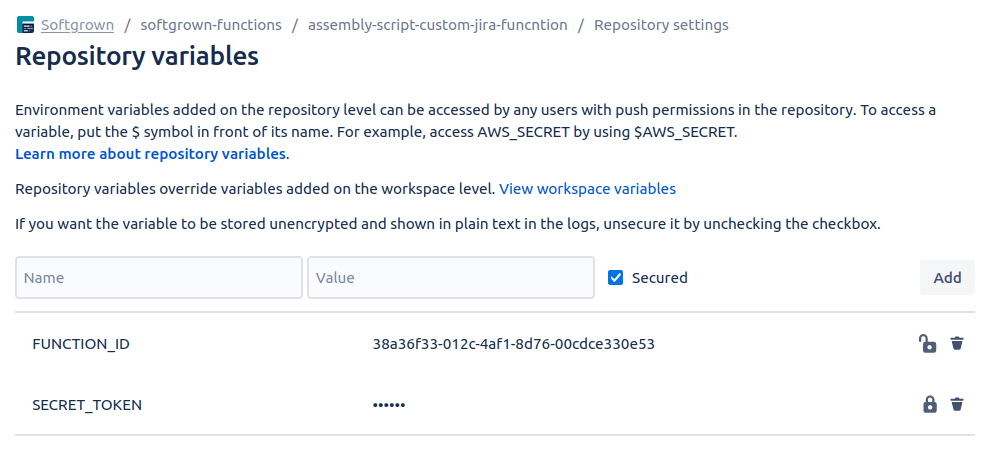
2. Deploy your post function #
Example with curl. Replace $FUNCTION_ID and $DEPLOYMENT_SECRET with your values or provide them as environment variables.
curl https://app.workflow-jira.com/deploy/$FUNCTION_ID \
-H "Content-Type: application/wasm" \
-H "Authorization: Bearer $DEPLOYMENT_SECRET" \
--data-binary @build/release.wasm
Example with Bitbucket pipeline:
- Full example: https://bitbucket.org/softgrown/assembly-script-custom-jira-funcntion/src/main/bitbucket-pipelines.yml
    # ...
    # Step example
    - step:
        trigger: manual
        image: curlimages/curl-base:8.5.0
        name: Deploy
        script:
          - >-
            curl https://app.workflow-jira.com/deploy/$FUNCTION_ID \
               -H "Content-Type: application/javascript" \
               -H "Authorization: Bearer $SECRET_TOKEN" \
               --data-binary @build/release.wasm
    # ...
3. Pick your post function in the Jira workflow transition #
- Edit your Jira workflow.
- Pick transition. Open Post Functions tab.
- Click “Add post functions” tab.
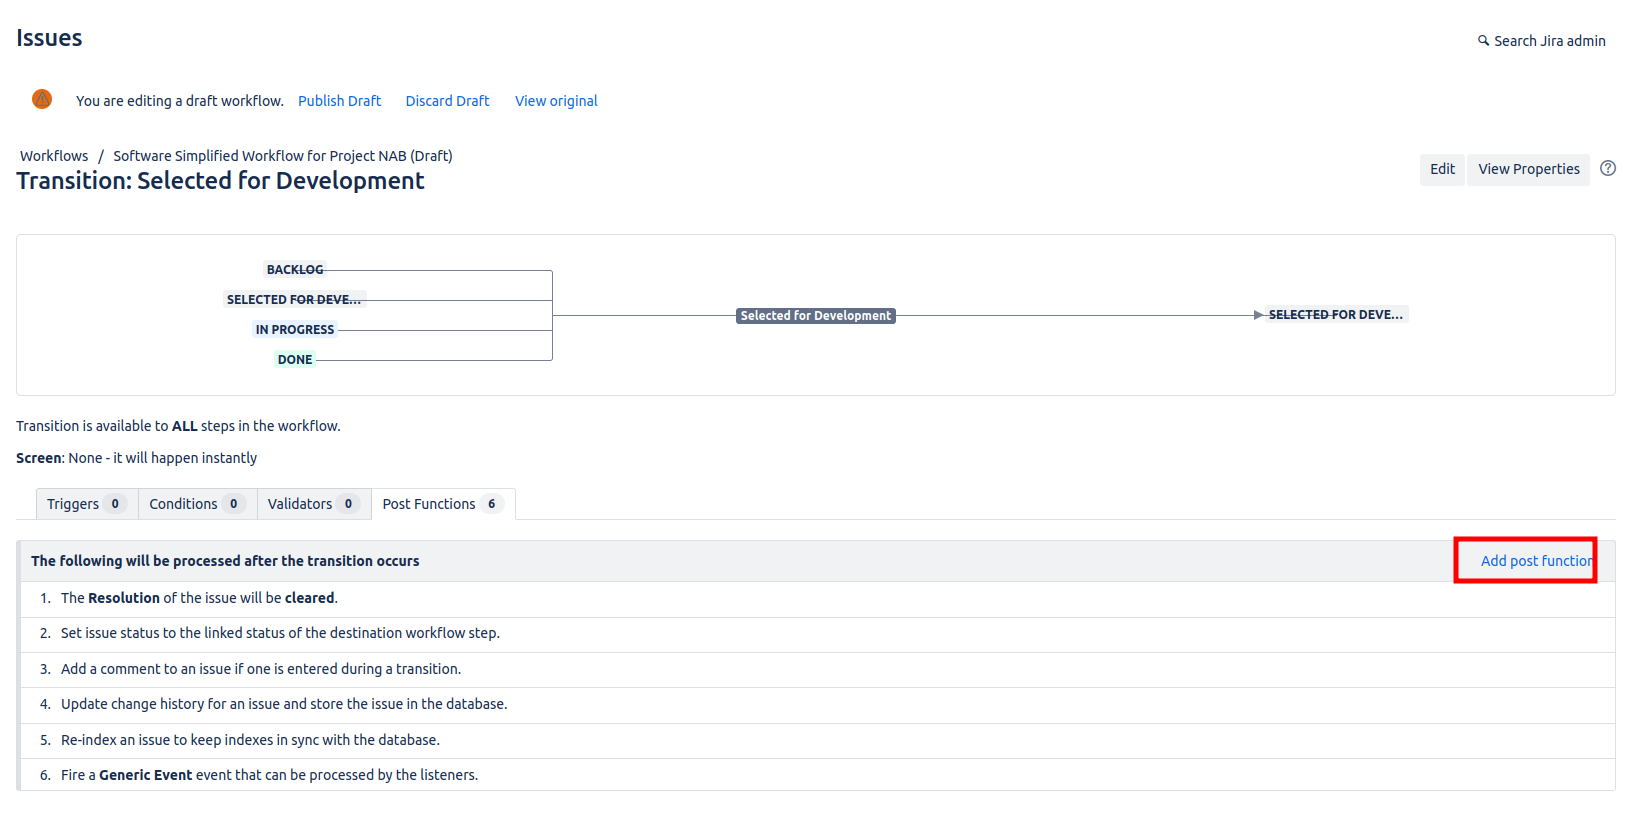
- Choose “Custom Post Function”
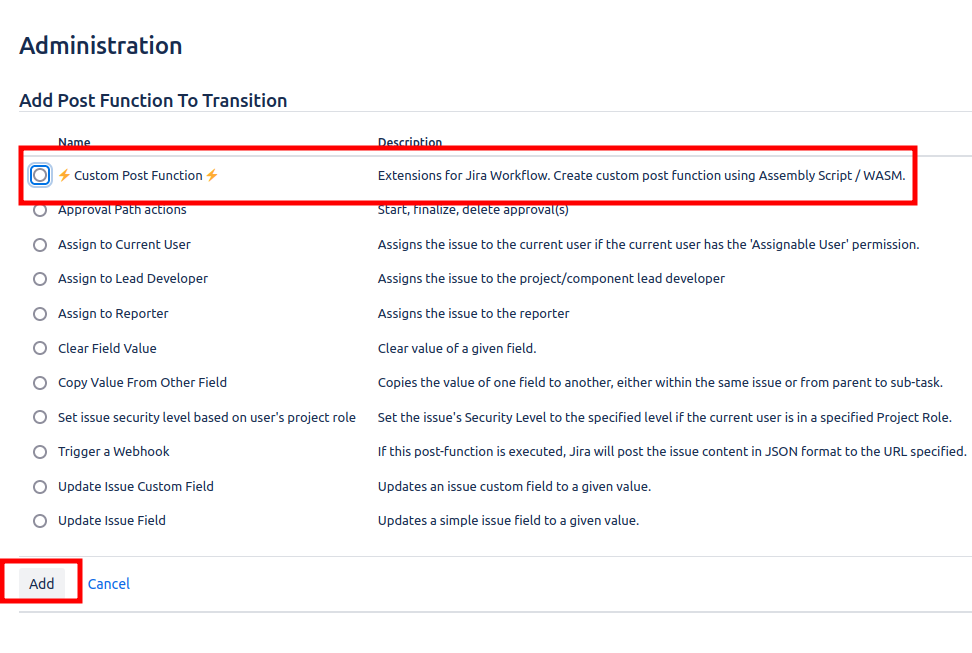
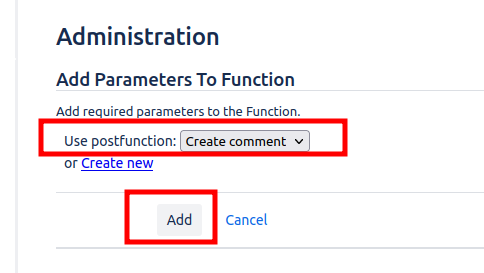
- Pick your post function from the list and “Add” it.
- And the result should look like this:
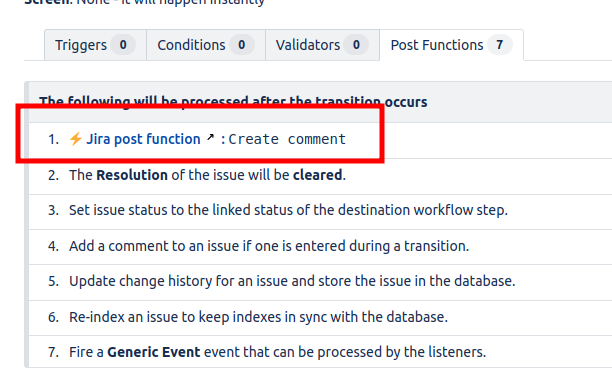
Do not forget to publish your workflow changes with “Publish Draft” button.
Team-managed project limitations #
In team-managed projects, it is not possible to extend workflows with custom conditions, validators, or post-functions. The predefined set of workflow rules must be used as-is, with no options for customization through plugins or custom development.